Following are the provisioning instructions for ‘Polycom 550’:

Make sure that the model is running on the version (4.0.13.1445 or 4.0.14.0987), if not kindly upgrade the version using the following procedure.
How to check the Version:
To check the running version of the model, you need to find out its IP address.
- Press Menu> Go to Status > Select Network > tcp/ip parameters > ip Eg:10.10.10.161
- Now open the browser and paste the IP address (10.10.10.161) in the URL field
- Click on the ‘Enter’, to redirect to the following page.
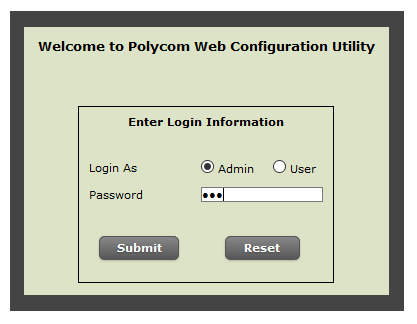
- Select Admin
- Enter the Password: 456
- Click on the Submit button
When you click on the button, it redirects to the home page (it comprises the Phone model, MAC Address and more)
- Now, Select Utilities Tab
- Choose Software Upgrade from the drop-down menu
- There you can see Current software version: 4.0.13.1445
If your model is running on the older version, upgrade it using the following steps:
Upgrade the Version
- Click on the Check for Updates button
- Choose the version 4.0.13.1445 or 4.0.14.0987 from the drop-down menu
- Click on the Install button
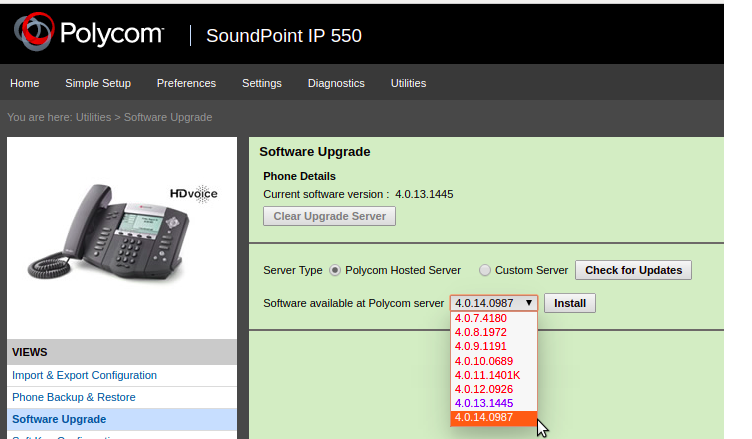
When you click on the Install button, a new pop-up window will appear as shown below.
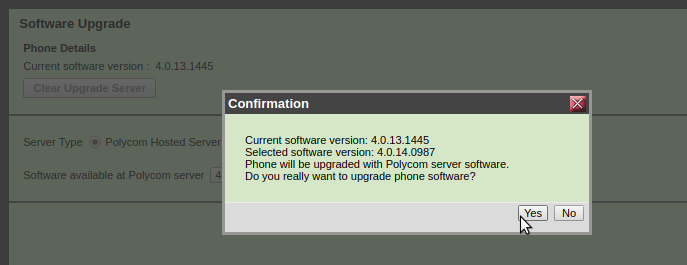
Click on Yes and then Accept the ‘License Agreement’.
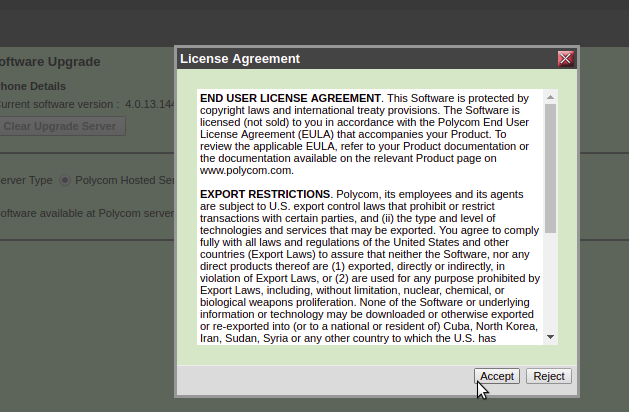
When you click on the Accept button, a new pop-up window appears regarding the update as shown below.
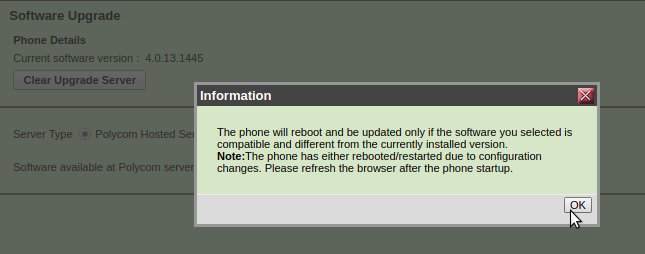
- Click on the Ok button
The phone will be automatically rebooted when you click on the ‘Ok’ button and takes a minimum of 10 minutes to upgrade the version. Later on, refresh the webpage to check the current status of the version.
Provision Instructions:
Following are the provisioning instructions for ‘Polycom 550’:

First and foremost do a Factory Reset of your desk phone (Polycom 550) using the below procedure:
- Press Menu > Go to Settings > Select Advanced
- Enter 456 (Password) & Select ‘Enter’ > Admin Settings > Reset to Defaults > Reset to Factory
- Click on Yes for the alert message ‘Are you sure’
When you select Yes, then the phone will be automatically rebooted and settings made to default.
Get the IP address of the Phone:
- Press Menu> Go to Status > Select Network > TCP/IP parameters > IP Eg:10.10.170
- Now open the browser and paste the IP address (10.10.10.170) in the URL field
- Click on the ‘Enter’, to redirect to the following page.
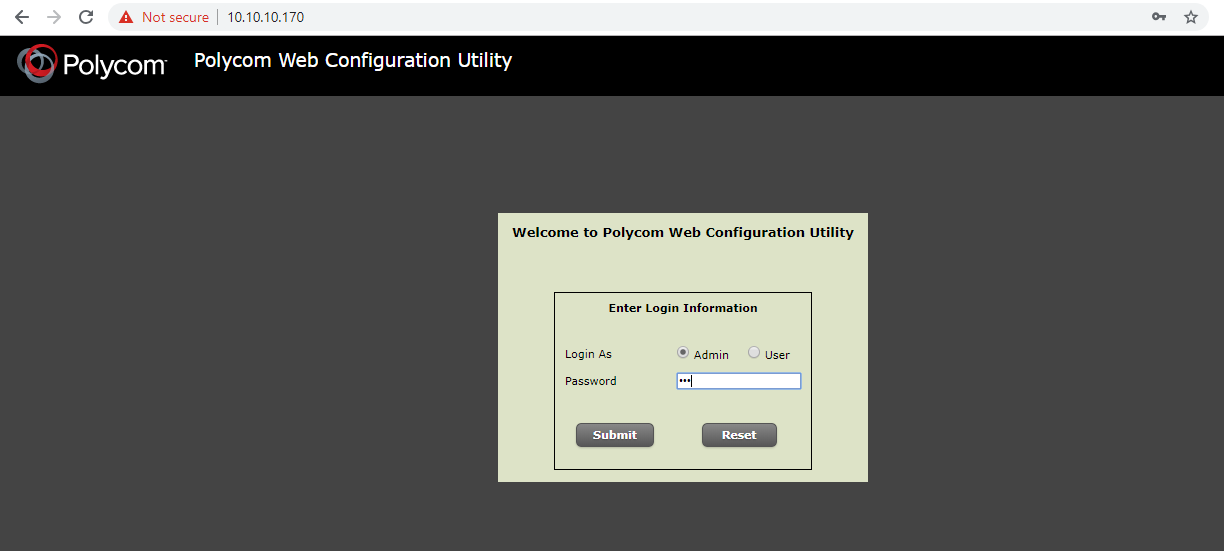
- Select Admin
- Enter the Password:456 in the given field
- Click on the Submit button
You’ll be redirected to the following page.
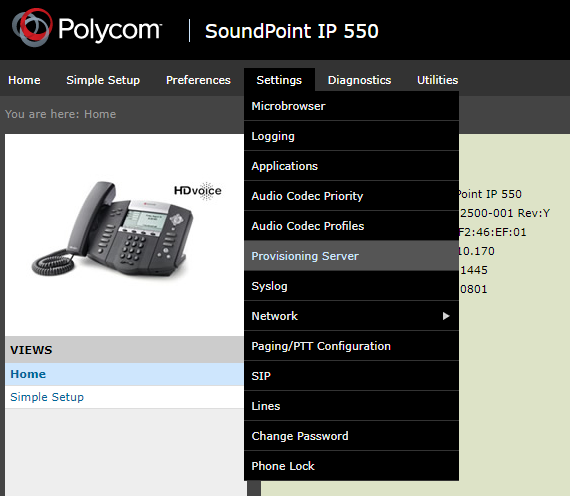
- Select Settings Tab
- Choose Provisioning Server from the drop-down menu, which leads to the page as depicted below.
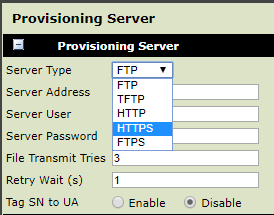
- Select ‘HTTPS’ from the ‘Server Type’ field.
-
Enter the URL (in the 'Server Address' filed), which has been sent to your registered email account.
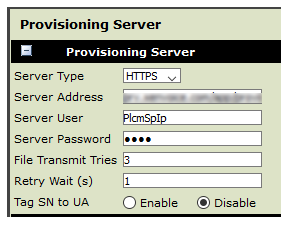
Now expand the DHCP Menu by clicking on the button
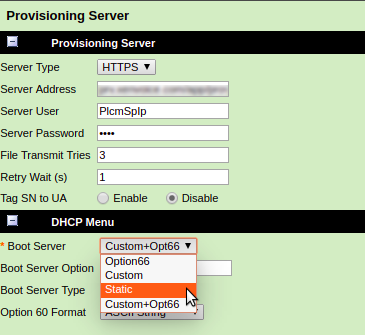
- Select Static option from the Boot Server drop-down menu.
- Then, click on the Save button and click Yes to save the configuration changes.
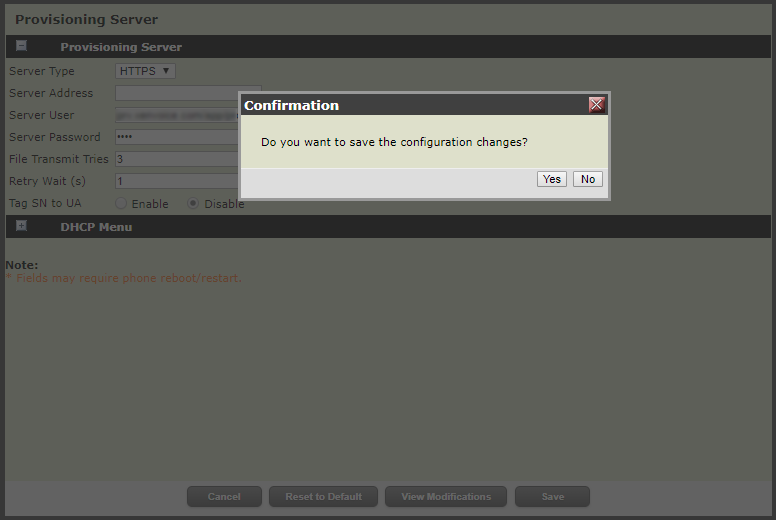
When you click on the button ‘Yes’, the phone will be automatically rebooted itself to reflect the changes. If it’s not rebooted automatically, kindly reboot it manually.
How to Reboot the Phone:
Reboot the phone by choosing Utilities > Reboot > yes > ok.
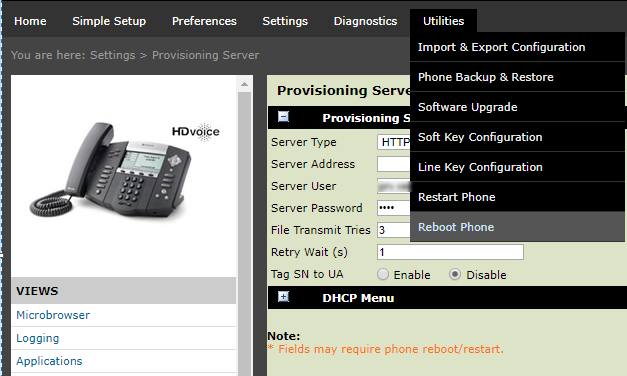
Note: Do not unplug your phone while the configuration is being updated as it receives data from the server.
It approximately takes around five minutes for the phone to configure the new provisioning settings.
If you have any queries please feel free to contact us at customercare@banter.io
Comments